STEP 1 - After removing the packaging
- Inspect the oven to see if it has damage which dents on the door or inside the cooking
- Immediately report any bruises or breakages to the seller.
Do not use the oven if damaged.
- Remove all packaging materials from the inside of the oven.
- If the oven has been stored in an extremely cold area, wait a few hours before connecting the power.
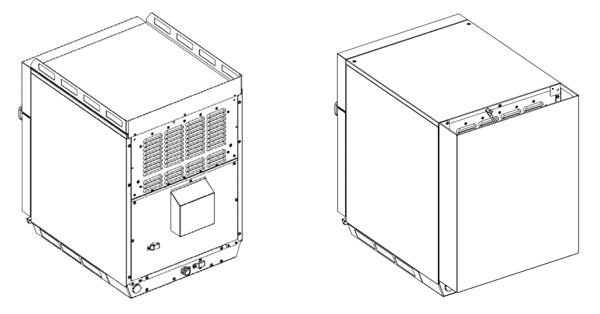
STEP 2 - Positioning the oven
- The recommended depth of the support surface is a minimum of 56 cm (22 inches) by 43 cm (17 inches) of width (ORAC ).
- The recommended depth of the support surface is a minimum of 70 cm (27,6 inches) by 53 cm (21 inches) of width (ORAC XL).
- Do not install oven next to or above source of heat, such as pizza oven or deep fat This could cause oven to operate incorrectly and could shorten life of electrical parts.
- Do not block or obstruct oven filters. Allow access for cleaning.
- Install oven on level countertop surface.
- Socket should be located so that plug is accessible when oven is in place.
- The oven can be fitted on the support that may be supplied as an The oven must be fixed to the support using the screws supplied with the support.
Place the oven on the support by aligning the threaded inserts on the bottom of the oven with the holes on the support frame. From under the frame, tighten the retaining screws to the oven.
- To assemble the adjustable feet (possibly supplied as an accessory), follow the instructions below:
- Move the cantilever oven frontally from the support surface by the distance necessary to free the feet fixing area
- Remove a piece of the gasket in order to ensure that the feet touch the bottom
- Assemble the feet
- Reposition the oven back on the support surface
- Repeat the operation for the rear feet or, with the help of a second person, carefully lift the rear part and assemble the feet
- Adjust the height of the feet in order to ensure the horizontality of the oven
- The Oracle ovens can be stacked on top of each To secure the upper oven, the following instructions must be followed:
- The upper oven MUST have the anti-slip gasket fitted
- Position the ovens on top of each other
- Remove two screws at the top from the back of the lower oven and two screws at the bottom from the back of the upper oven.
- Secure the two ovens together using the two brackets supplied and the screws that have been removed as shown in the figure

- The Oracle ovens can be equipped with an accessory for objects to be placed on top of the oven or with a rear heat For both of these accessories, proceed with assembly and fixing to the oven using the back screws as shown in the images below.
STEP 3 - Oven tray installation
- Oven cavity must be cool to touch.
- Place tray in oven with curved edge toward the front of cavity.

DO NOT cook food directly on floor of oven.